
Did you know?!?!
Bassinets aren't cheap! You're looking at anywhere between $70-$150+ for something your baby will sleep in for all of a few months in many cases. I was definitely not looking to spend that for our 2nd baby when I already had a perfectly good bedside sleeper/travel crib leftover from my daughter. However, it was just that... leftover from my daughter complete with the cute pink accents!
Nonetheless!! I was determined to make this work for our son!

Scratch that idea.
Then I thought, what about making strips of fabric to fit each side just enough to cover the pink in length and width... but how on earth am I going to attach it to the crib? Brainstorming and internet searches were coming up empty but I was so gonna figure this out even if I had to go buy a large sewing needle and hand-stitch with thick thread!
I knew I'd be able to sew fabric on to the bumper pad so I wasn't too concerned about that part.
I knew I'd be able to sew fabric on to the bumper pad so I wasn't too concerned about that part.
So here it goes...
There is truly no strategy here, I figured it out as I went so I'll show you some pictures of what I did, explain a little bit, then show you the final product. I don't expect you to drop your jaw in sheer awe because this just isn't one of those projects.
The best part about this is I haven't ruined the original product to where it can't be sold/donated later in its original condition once we are done with it. It's simply a cosmetic fix to get us through.
(hooray for seam rippers!)
The best part about this is I haven't ruined the original product to where it can't be sold/donated later in its original condition once we are done with it. It's simply a cosmetic fix to get us through.
(hooray for seam rippers!)
Grab ya some scrap fabric (or go buy some, whichever!). I chose green and yellow from my stash.
I took a few measurements including the length and complete width, measuring from the bottom edge on the outside around to the bottom edge of the inside of the pink fabric in my case. This way once you attach the fabric it will fold over the side and cover all of the pink both inside and out of the crib.
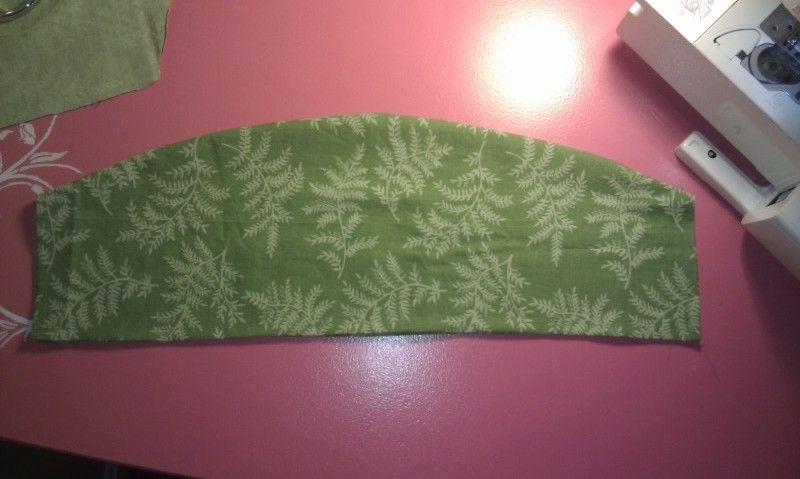
Cut your fabric along with a seam allowance, fold in (iron if needed) and sew up the edges all the way around. You will need 2 of these pieces, 1 for each long side.
Cut your fabric along with a seam allowance, fold in (iron if needed) and sew up the edges all the way around. You will need 2 of these pieces, 1 for each long side.

The short edges might be a little more difficult since it's rounded on top, so I laid the crib on the ground on top of the fabric and traced it. Measure how tall you need the piece to be plus a little bit of seam allowance, then cut 4 pieces to match (2 for each side).

Fold in and sew the bottom and side edges of all 4 pieces.

Sew two of the pieces, right
sides together, around the top rounded part only! Don't sew the bottom or sides!
Once you've done that, flip it right side out. It should now slide
easily over the short rounded side of your travel crib.
~~~~
On to the bassinet bumper...
Measure the inside length all the way around your bassinet bumper. Measure the height and cut your fabric to match that including a seam allowance. Fold in and sew your seam all the way around. My fabric wasn't long enough so I did have to attach a few pieces to get the appropriate length.

This is probably the hardest part: Sewing your bumper fabric on. Make sure you have a good strong needle (like one used for denim) and a little patience to go slow. Shoving the end of your fabric in to a corner of the bumper, sew it from top to bottom to hold it securely in place.


Now you can start sewing the fabric on to the bumper. I started on top since that edge is easiest to reach with the machine and sewed down the length of one side as close as possible to the edge of the yellow fabric while keeping it as close as possible to the binding of the bumper. In the below photo you can see the stitching that was already on the yellow fabric and how my needle is positioned slightly to the right of it.

On the top of your long sides you are going to encounter the plastic clamps that hold the bumper to the crib. Because those boogers are sewn down in to the bumper pad you'll need to sew around this a little differently. I decided to skip over that part then go back to it after I'd sewn the rest of the top on either side of the clamps.

Alright, got all of the top sewn now except for the section around the clamp as shown above.
It was actually easier to sew this part with the clamp on the left of the presser foot which meant doing a lot of shoving of bumper fabric in the tiny spot between the presser foot and the machine lol, that was interesting, but otherwise the little screw to the right of the presser foot would not have allowed me to lift the plastic clamp up well enough sew. Trust me, I tried to work around that.

Once you've finished sewing the top of one side, go back and sew across the bottom. That will give you one side completely sewn. At the corner where you meet your new side, sew down the edge as close to the corner seam of the bumper as possible (just like you did at the very beginning).
In the below picture you can see how it's nice and secure and ready for you to move on to the next side and sew.

I made sure to be "safe" and not sew over top of the warning label. The yellow fabric is pretty see-through so it wouldn't look very good to cover it up. I just cut the fabric and sewed the edge along the label, then picked up with reattaching the rest of the yellow on the other side of the label.

Finish sewing all the way around your bumper, top and bottom. Since I had cut a large chunk of yellow out for the label I ended up with a bunch of leftovers at the end. All I had to do was cut it off, fold the edge under, tuck it in the corner and do the last bit of stitching.
~~~~
The final step.... we get to attach those (green, in my case) edge pieces to the crib. I don't really have any pictures of that because there isn't much to show aside from how it looks once all the pieces are on. I decided to use safety pins. It took a little patience and finagling to get them on there and secure.
I'm not concerned about the baby getting to the pins because once the bumper is on they are covered up from the inside, and the crib will be put away long before he will ever walk or be able to mess with it.
Since the crib is wedged between my bed and the wall I opted not to mess with the cute pink skirt on the bottom aside from pinning it back on the one side that is visible.

For now I covered the mattress pad with the blanket that
came with our crib bedding set. I will either buy or make a matching
sheet to cover the pad eventually.

***I would not recommend doing this with a full-size Pack n' Play unless you plan to sew on ALL of the fabric you add like I mentioned in the beginning. In general you've got the older babies in these and the safety pins can be a hazard!! This mini travel crib can be used like a Pack n' Play by removing the bassinet... if an older baby that can stand and reach the added fabric is put in it, you need to remove the fabric and safety pins.***
Overall this was a pretty simple project and with using leftover fabric from my stash it really didn't cost me a penny! I'm very happy with not having to go spend $100 on a new bassinet. I hope this will encourage and inspire you to save a little bit of money and consider repurposing!!
No comments:
Post a Comment
I LOVE comments so please leave one about my post before continuing on your creative journey!